
Members
Workspace settings > Members is where you invite and manage the people you work with.
PRACTICAL EXAMPLE
Learn with an example
Invite a teammate to review translations
- When to use it
- You want one person to create translations and another person to review them.
- What you need
- Invitation permission, an available plan seat, and the real recipient's consent
- Check seats
Check current and allowed member counts in Workspace settings → Members.
- Confirm the recipient
In Invite member, verify your consenting teammate's actual email. reviewer@example.com is illustrative and must not be used for sending.
- Check submission
If sending a real invitation, check the email-sent notice and pending invitations.
- Check access after acceptance
Once accepted, check the member list and separately verify the required group and work permissions.
You distinguish invitation submission from acceptance and verify the reviewer's work access.
Screen and feature reference
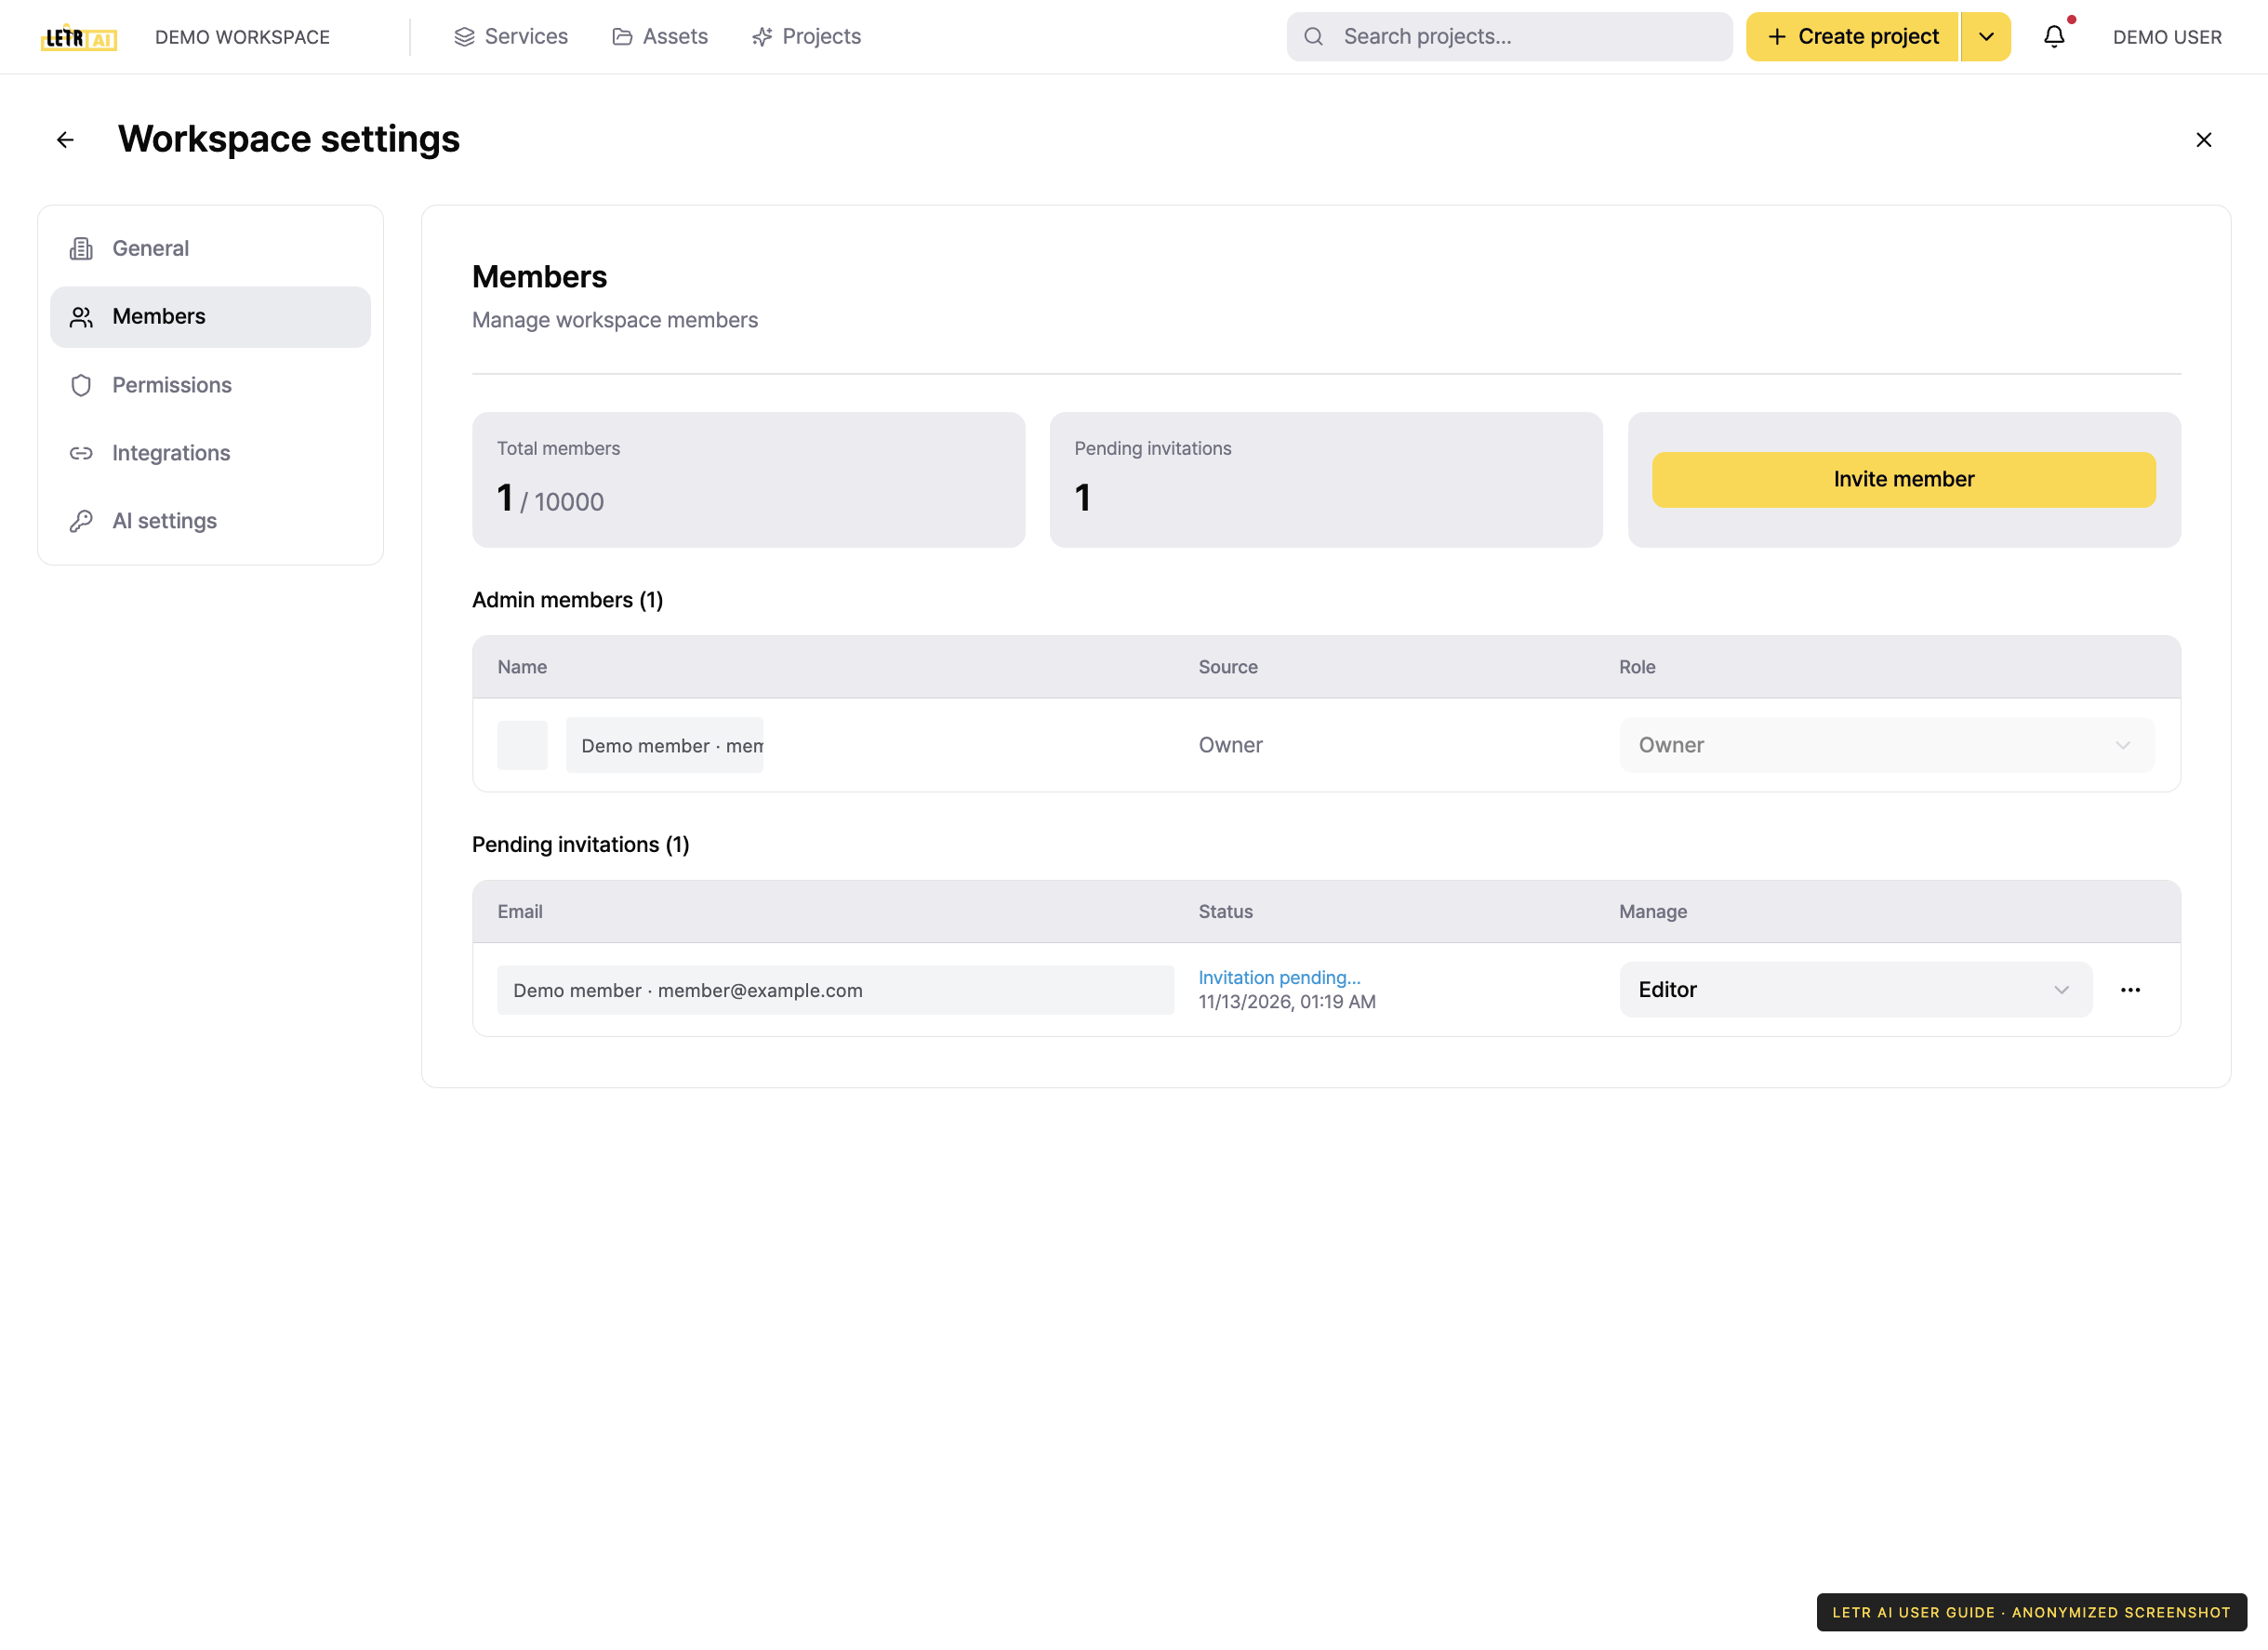
The top of the screen summarizes the current state.
| Field | Description |
|---|---|
| Total members | Current members / the maximum your plan allows |
| Pending invitations | Invitations sent but not yet accepted |
Inviting a member#
- Go to Workspace settings > Members.
- Press Invite member at the top right.
- Enter the email address and send the invitation.
The invitation appears under Pending invitations with its email and status. Once accepted, the person moves to the Admin members table.
Status shows one of the following.
| Status | Meaning |
|---|---|
| Invitation pending… | Sent, no answer yet |
| Accepted | The person accepted |
| Rejected / expired | Declined, or the deadline passed |
| Invitation expired | The invitation timed out |
| Invitation canceled | You canceled the invitation |
The Manage column holds Resend invite and Cancel invite.
The member list#
The Admin members table shows each member's name, email, source, and role. Change a member's role from the dropdown in the Role column.
| Column | Description |
|---|---|
| Name | The member's nickname and email address |
| Source | Whether they created the workspace or were invited |
| Role | Owner, Admin, or User |
To remove someone, use Remove member on their row.
What each role can do is covered in Permissions.
Account and contact details in screenshots are anonymized. Menus may vary by role and release.