
Creating a project
Projects start from the Create project button at the right of the global header. Creation runs in four steps, shown down the left side of the screen.
PRACTICAL EXAMPLE
Learn with an example
Translate a three-sentence sample into Korean
- When to use it
- You want a short trial from project creation to opening the editor before using real work.
- What you need
- manual-demo.docx, project creation permission, and available credits
- Choose a type
Select Document Globalization under Create project.
- Upload the sample
At Source, choose Upload new files and select manual-demo.docx.
- Check the options
Check English as source, Korean as target, and Manual Demo as the name. Review any folder-default resources being inherited.
- Create and open
Read the cost notice and press Create project once. When analysis finishes, open the editor and check all three sentences.
The editor shows three source sentences and Korean translations. AI wording may differ from the sample translation.
Screen and feature reference
1 Type → 2 Source → 3 Options → 4 Create
Step 1. Type#
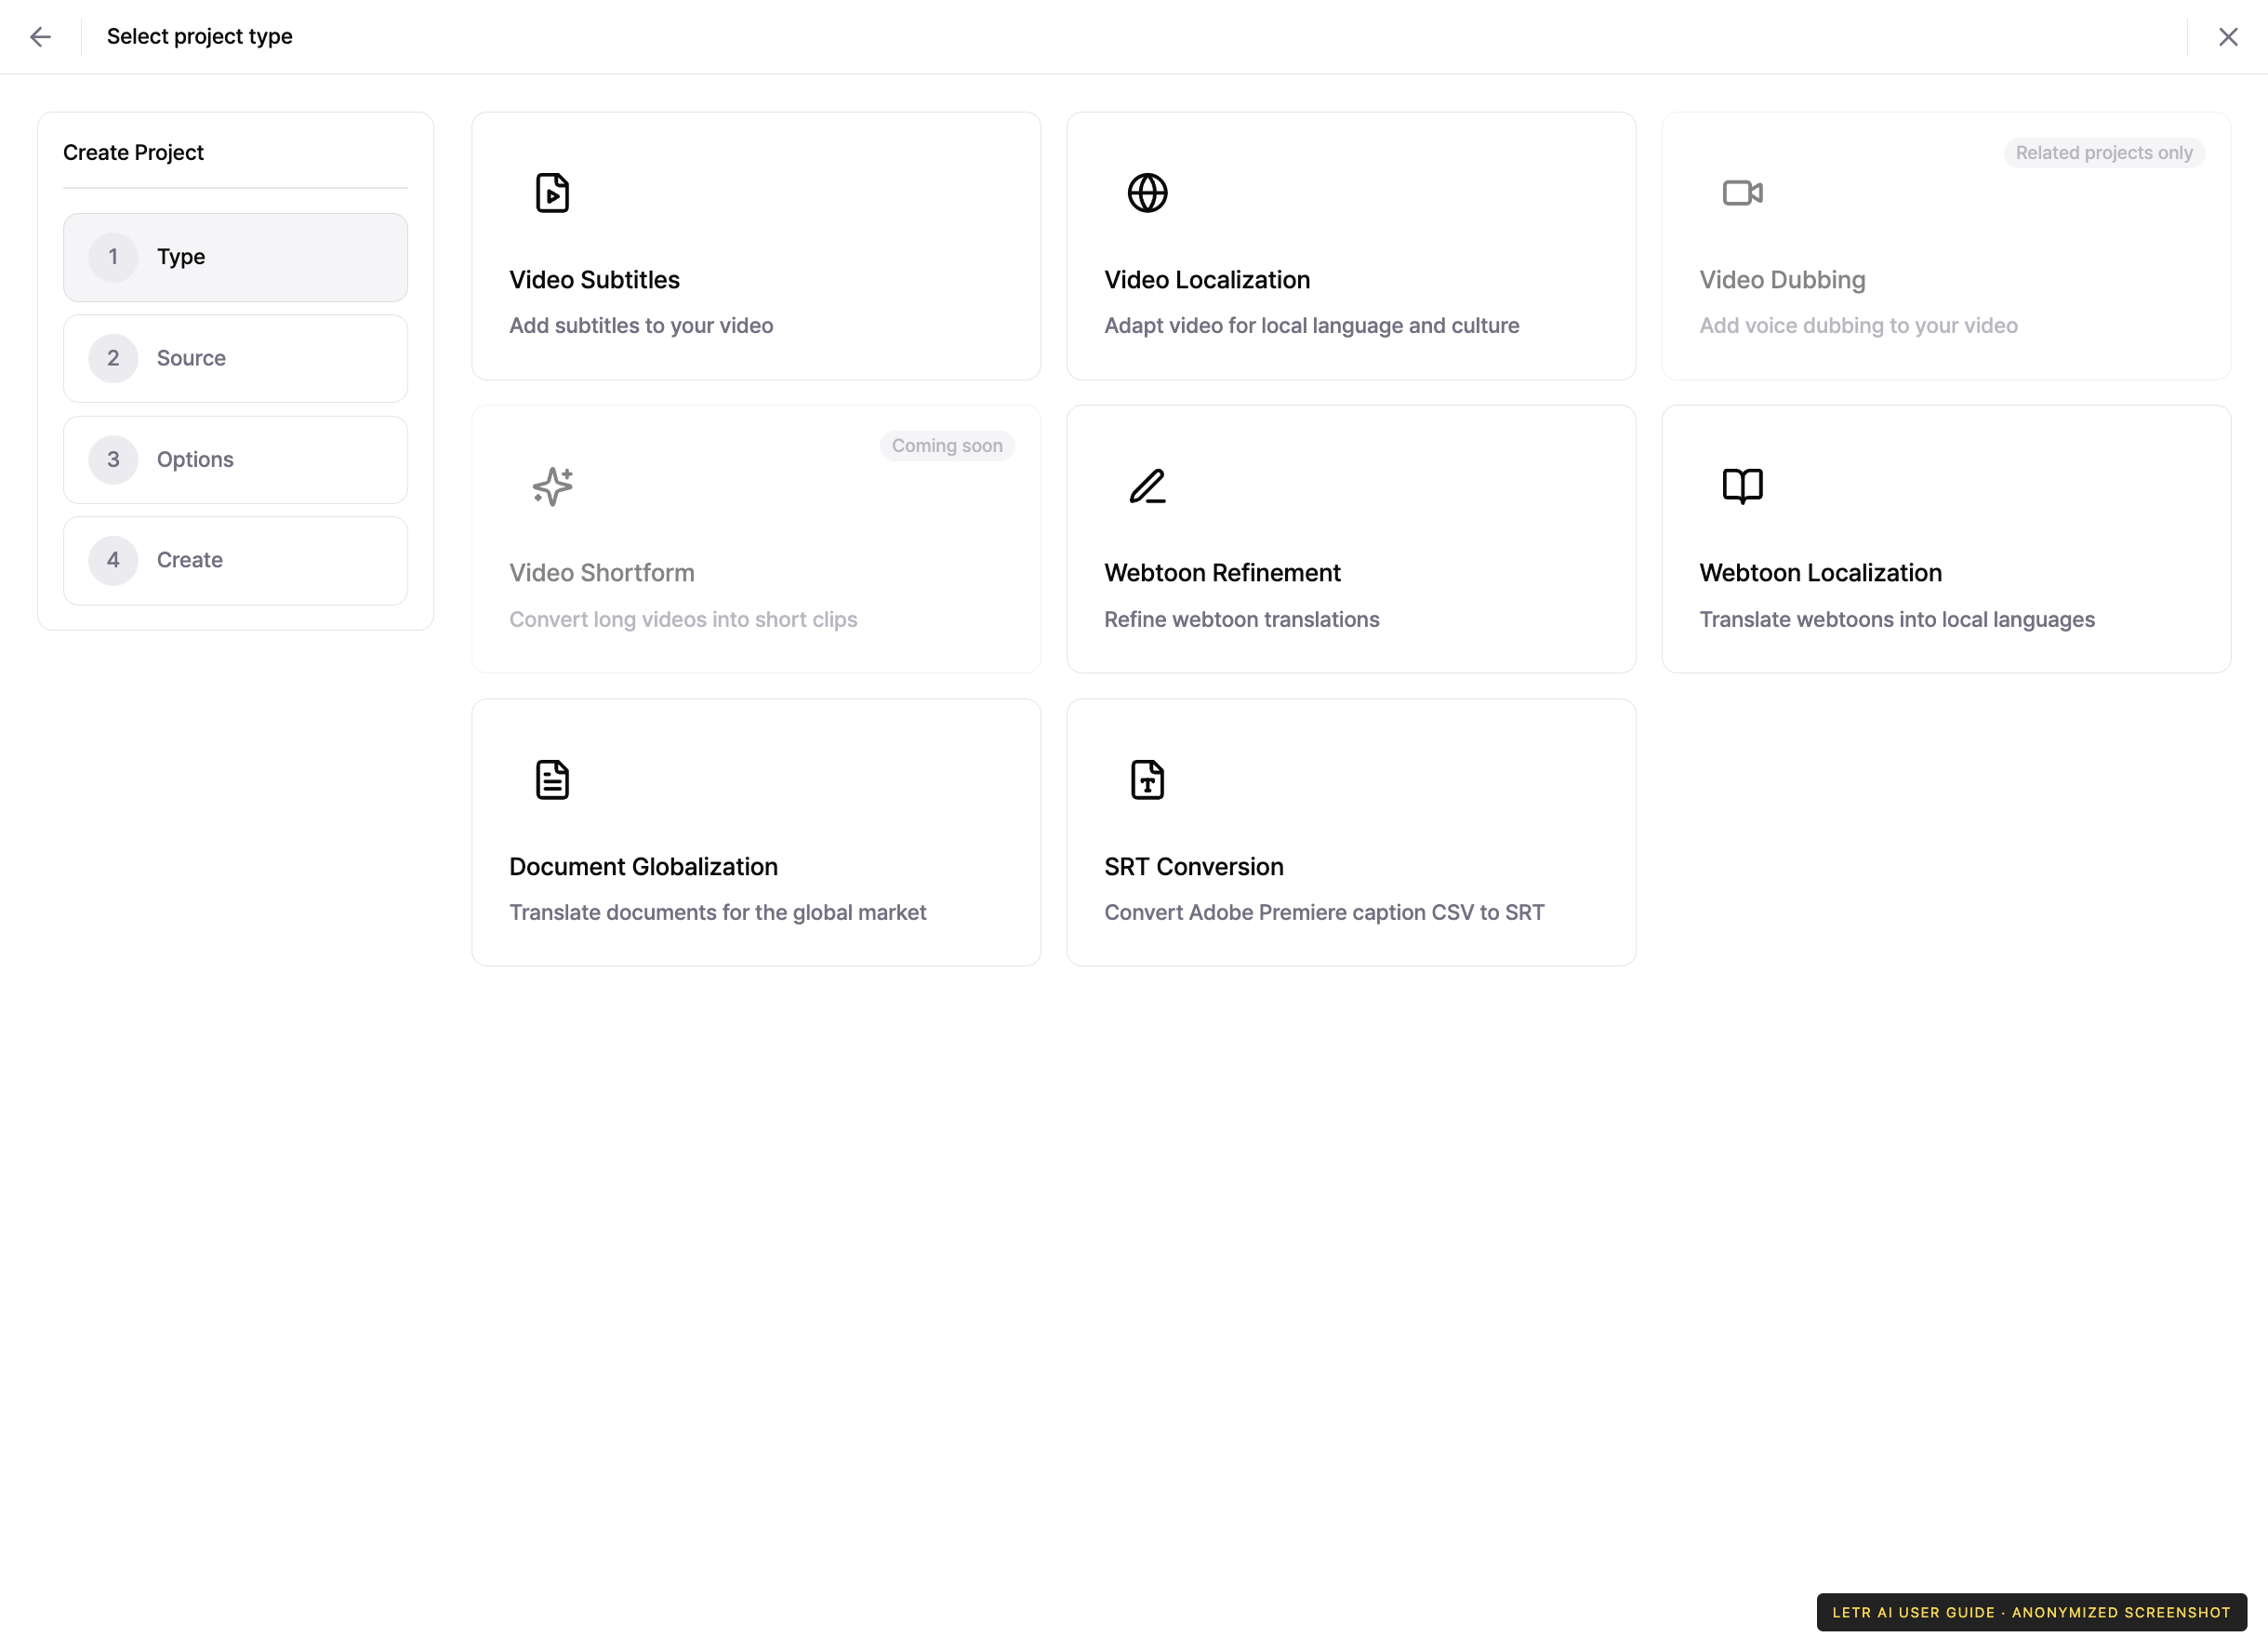
Pick the card matching the work you want to do. Each type is described in Projects.
Step 2. Source#
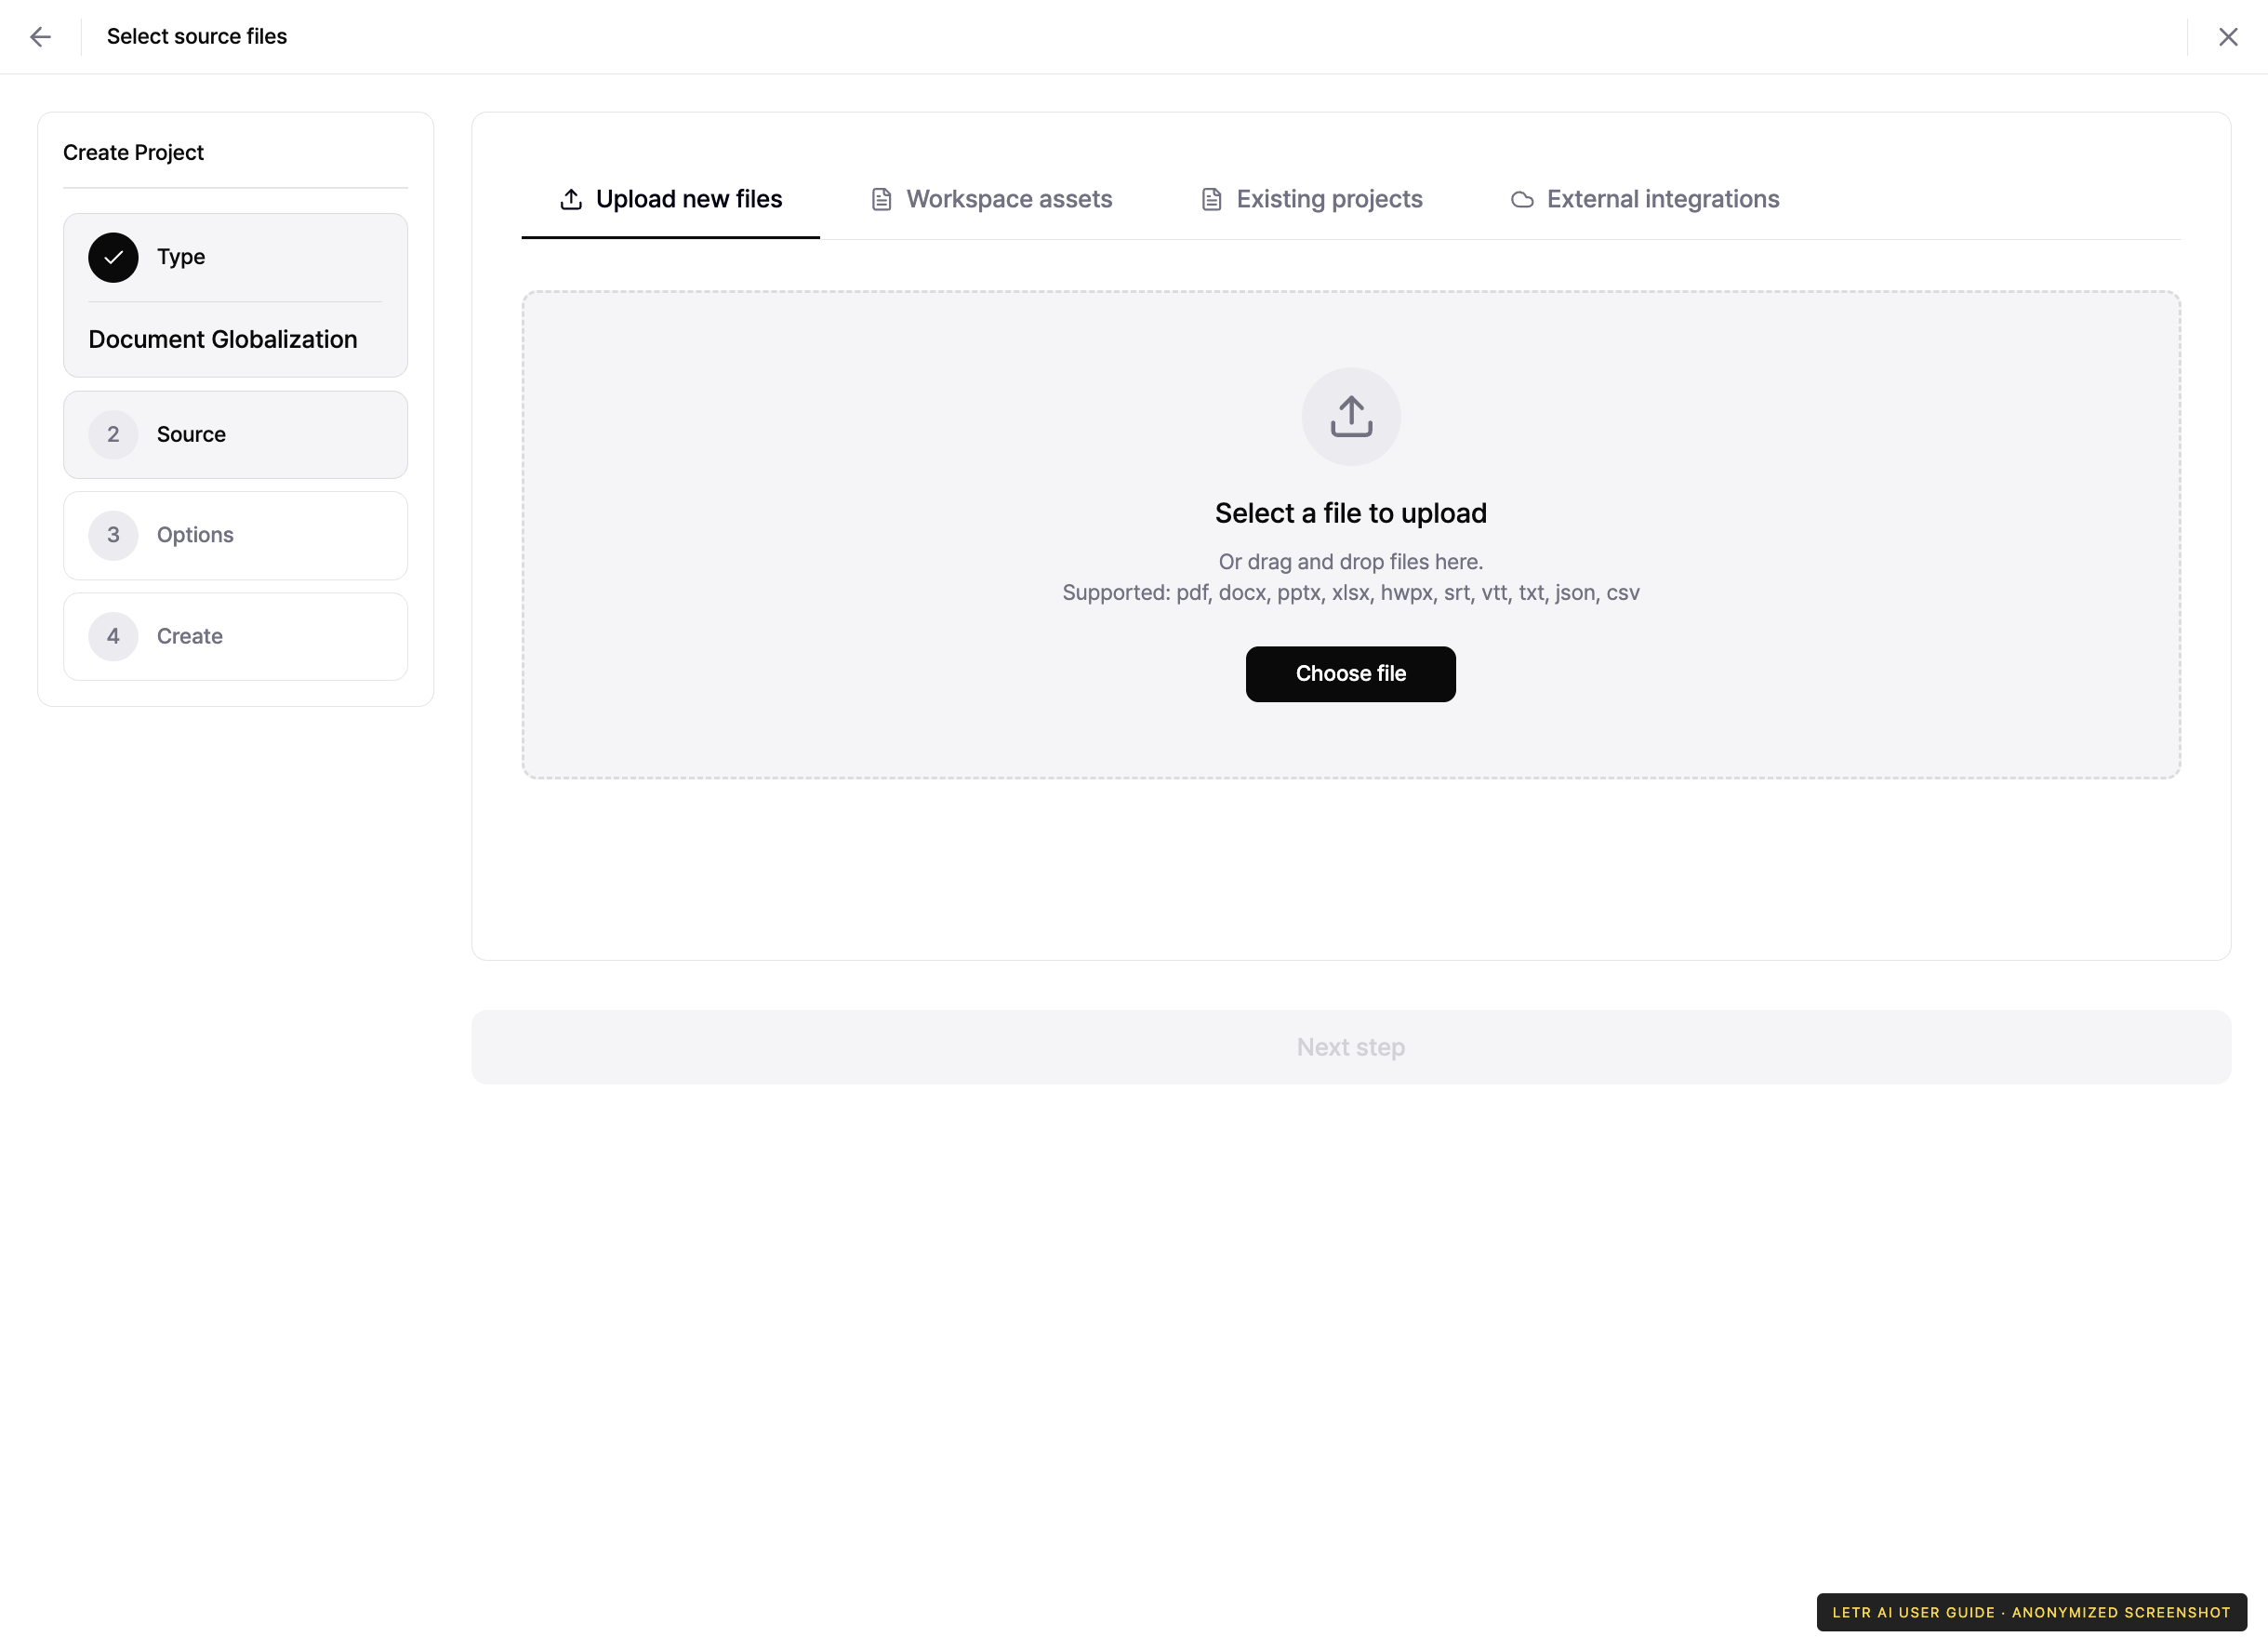
Choose where the source material comes from.
| Option | Description |
|---|---|
| Upload new files | Upload from your computer. You can also drag files onto the area |
| Workspace assets | Reuse an asset already registered in the workspace |
| Existing projects | Reuse the source another project used |
| External integrations | Pull from a connected app such as Google Drive |
Step 3. Options#
Set the conditions the project follows — source and target language, and the work period. For video projects you can also set the subtitle rules (maximum characters per line, maximum lines), which you can change later at any time from the Manage panel.
For the document exercise, choose Document Globalization, source English, and target Korean. Inherit folder defaults under the linked resources can attach existing material. Review those resources or disable inheritance when practicing only with the sample.
Step 4. Create#
Pressing Create project at the Options step starts the actual upload and creation. Step 4 displays progress. Do not assume there is another final confirmation: check languages, linked resources, and any cost notice before pressing the button. If you selected several source files, one project is created per file. Do not submit again while processing.
A newly created project shows as Waiting while its source is analyzed. Once ready, you can open the editor.
Where projects live#
Projects sit under folder > group. Choose the group in the tree on the left of the project list before creating, and the members with access to that group will see it.
Account and contact details in screenshots are anonymized. Menus may vary by role and release.